Learning React.js by building a Minesweeper game
Learning React.js by building a Minesweeper game
 Sandip Shrestha
I started learning React as a beginner in JavaScript a while back. That is how I came across this introductory tutorial to make a tic-tac-toe game (link to the tutorial). It is well documented and really easy to follow. I completed the tutorial and made a mean looking tic-tac-toe game (pun slightly intended).
I did learn about the basic concepts of React but like other “follow along” tutorials, it left me thinking if I really learnt anything substantial. All the code I wrote had already been written by someone else. That’s when I thought of making something similar to tic-tac-toe to test what I had learnt and to learn more in the process. Now, what would be better than a classic minesweeper game.

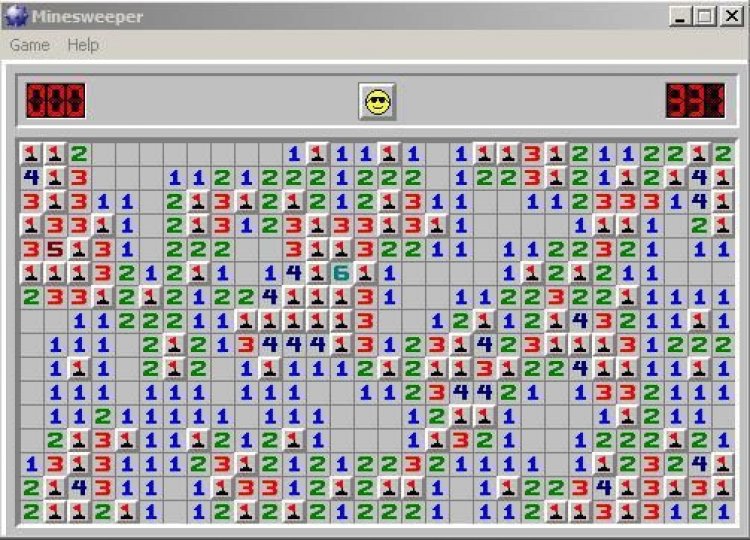
Minesweeper game is a classic board game that is aesthetically similar to tic-tac-toe and it is simple enough to be possible for a beginner like me to build.The final product
Getting Started
We will have 3 components.
- Cell : The cell component renders a cell div that represents each square in the board.
- Board: The board component renders a 8×8 board containing a total of 64 cells and 10 of the cells will contain mines.
- Game: The game component renders the board component.
Rules of the game
- The goal of the game is to find all the mines on the board.
- You reveal mines by clicking the cells, if you reveal a mine you loose.
- If you reveal a cell without mine it will show number of mines surrounding the cell.
- You can flag a field by right clicking it.
- You win the game if you are able to reveal all the cells that is not a mine or you have flagged all the cells that is a mine.
Diving into actual code
I used create-react-app starter kit to setup my project and later added the 3 components. I won’t be mentioning any style specific codes and some helper functions for the sake of keeping the post as short as possible.
To keep our code fairly simple we will be building each component as classes without using constructors to avoid binding functions as much as we can.
Game component
The Game component stores the height and width of the board along with number of mines in its state which is later on passed as props to Board component.
class Game extends React.Component {
  state = {
    height: 8,
    width: 8,
    mines: 10
  };
render() {
    const { height, width, mines } = this.state;
    return (
    );
  }
}
Cell component
The Cell component renders each square. We use the getValue() method to determine a suitable value to be rendered by each cell.
- If the cell is not yet revealed we return a null value.
- If the cell is not revealed but is flagged by the user we return a flag(
 ).
). - If the cell is revealed and is a mine we return a bomb(
 ).
). - If the cell is revealed we return the number of neighbour mines for that cell.
- If the cell is revealed and has zero mines in its neighbouring cells, we return a null value.
class Cell extends React.Component {
  getValue() {
    const {value} = this.props;

    if (!value.isRevealed) {
      return this.props.value.isFlagged ? "" : null;
    }
    if (value.isMine) {
      return "";
    }
    if (value.neighbour === 0) {
      return null;
    }
    return value.neighbour;
  }
render() {
    const {value, onClick, cMenu} = this.props;
    return (
onContextMenu={this.props.cMenu}
>
{this.getValue()}
    );
  }
}
// Type checking With PropTypes
const cellItemShape = {
  isRevealed: PropTypes.bool,
  isMine: PropTypes.bool,
  isFlagged: PropTypes.bool
}
Cell.propTypes = {
  value: PropTypes.objectOf(PropTypes.shape(cellItemShape)),
  onClick: PropTypes.func,
  cMenu: PropTypes.func
}
Board component
This is the component where all the magic happens. In its basic form Board component maintains boardData state to hold the values of each cell, gameStatus state to distinguish if a game is in progress or won, mineCountstate to keep a track of mines that remain to be found(flagged). It renders a section containing information on number of mines remaining & whether game has been won and the board itself.
class Board extends React.Component {
  state = {
    boardData: this.initBoardData(this.props.height, this.props.width, this.props.mines),
    gameStatus: false,
    mineCount: this.props.mines
  };
render() {
  return (
mines: {this.state.mineCount}
{this.state.gameStatus}
{ this.renderBoard(this.state.boardData)}
);
}
}
// Type checking With PropTypes
Board.propTypes = {
  height: PropTypes.number,
  width: PropTypes.number,
  mines: PropTypes.number,
}
The initiBoard() function prepares the initial array containing the data for each cell. It can be divided into 3 functions: createEmptyArray(), plantMines() and getNeighbours().
createEmptyArray() initializes a two dimensional array and each cell represented by two dimensional item data[x][y] which contains defaultvalues of different attributes.
createEmptyArray(height, width) {
  let data = [];
  for (let i = 0; i < height; i++) {
    data.push([]);
    for (let j = 0; j < width; j++) {
      data[i][j] = {
        x: i,
        y: j,
        isMine: false,
        neighbour: 0,
        isRevealed: false,
        isEmpty: false,
        isFlagged: false,
      };
    }
  }
  return data;
}
plantMines() randomly plants 10 mines by randomly selecting cells as assigning the isMine key with true.
plantMines(data, height, width, mines) {
  let randomx, randomy, minesPlanted = 0;
  while (minesPlanted < mines) {
    randomx = this.getRandomNumber(width);
    randomy = this.getRandomNumber(height);
    if (!(data[randomx][randomy].isMine)) {
      data[randomx][randomy].isMine = true;
      minesPlanted++;
    }
  }
  return (data);
}
getNeighbours() processes every cell which is not a mine, get its surrounding cells, calculate the number of surrounding cells that are mines and updates neighbour attribute of that cell with the total number of mines.
getNeighbours(data, height, width) {
  let updatedData = data;
  for (let i = 0; i < height; i++) {
    for (let j = 0; j < width; j++) {
      if (data[i][j].isMine !== true) {
        let mine = 0;
        const area = this.traverseBoard(data[i][j].x, data[i][j].y, data);
        area.map(value => {
          if (value.isMine) {
            mine++;
          }
        });
        if (mine === 0) {
          updatedData[i][j].isEmpty = true;
        }
        updatedData[i][j].neighbour = mine;
      }
    }
  }
  return (updatedData);
}
However, we will need some way to find the surrounding cells. I created a traverseBoard() method just to do that.
// looks for neighbouring cells and returns them
traverseBoard(x, y, data) {
  const el = [];
   //up
  if (x > 0) {
    el.push(data[x - 1][y]);
  }
   //down
  if (x < this.props.height - 1) {
    el.push(data[x + 1][y]);
  }
   //left
  if (y > 0) {
    el.push(data[x][y - 1]);
  }
   //right
  if (y < this.props.width - 1) {
    el.push(data[x][y + 1]);
  }
   // top left
  if (x > 0 && y > 0) {
    el.push(data[x - 1][y - 1]);
  }
   // top right
  if (x > 0 && y < this.props.width - 1) {
    el.push(data[x - 1][y + 1]);
  }
   // bottom right
  if (x < this.props.height - 1 && y < this.props.width - 1) {
    el.push(data[x + 1][y + 1]);
  }
   // bottom left
  if (x < this.props.height - 1 && y > 0) {
    el.push(data[x + 1][y - 1]);
  }
   return el;
}
Our final initBoardData function looks like this.
initBoardData(height, width, mines) {
  let data = this.createEmptyArray(height, width);
  data = this.plantMines(data, height, width, mines);
  data = this.getNeighbours(data, height, width);

  return data;
}
Rendering the board
The renderBoard function is self explanatory. It takes a two dimension array and loops through each item in the array and returns a Cell component for each item. Do not worry about the handleCellClick and handleContextMenufunctions, we will get to them next.
renderBoard(data) {
   return data.map((datarow) => {
     return datarow.map((dataitem) => {
       return (
onClick={() => this.handleCellClick(dataitem.x, dataitem.y)}
cMenu={(e) => this.handleContextMenu(e, dataitem.x, dataitem.y)}
value={dataitem}
/>
// This line of code adds a clearfix div after the last cell of each row.
{(datarow[datarow.length - 1] === dataitem) ?
);
})
});
}
Handling Click Event
When a user clicks a cell we need to reveal the field to the user. The reveal logic is dead simple.
- If the cell clicked and is not empty, reveal the value of the field.
- If the cell field is a mine, game over.
- If the cell is empty, recursively reveal all the empty neighbouring fields.
- If the cell is already revealed or flagged don’t do anything.
handleCellClick(x, y) {
  // check if revealed. return if true.
  if (this.state.boardData[x][y].isRevealed ||    this.state.boardData[x][y].isFlagged) return null;

 // check if mine. game over if true
  if (this.state.boardData[x][y].isMine) {
    this.setState({gameStatus: "You Lost."});
    this.revealBoard();
    alert("game over");
  }

  let updatedData = this.state.boardData;
  if (updatedData[x][y].isEmpty) {
    updatedData = this.revealEmpty(x, y, updatedData);
  }

  if (this.getHidden(updatedData).length === this.props.mines) {
    this.setState({gameStatus: "You Win."});
    this.revealBoard();
    alert("You Win");
  }

  this.setState({
    boardData: updatedData,
    mineCount: this.props.mines -this.getFlags(updatedData).length,
    gameWon: win,
  });
}
The revealEmpty() function recursively reveals all the empty cells when a user clicks an empty cell.
revealEmpty(x, y, data) {
  let area = this.traverseBoard(x, y, data);
  area.map(value => {
    if (!value.isFlagged && !value.isRevealed && (value.isEmpty || !value.isMine)) {
      data[value.x][value.y].isRevealed = true;
      if (value.isEmpty) {
        this.revealEmpty(value.x, value.y, data);
      }
    }
  });
  return data;
}
Flagging and Handling Right Click Event
We need to flag a cell as a possible mine when the user right clicks on a cell. To do this we add a handleContextMenu() function on the Board component and pass it down to Cell component to be used as onContextMenu attribute value. The cool thing is that we can pass down the right-click event down to the Cell component along with the handler function.
The handleContextMenu function
- flags the cell if it’s not revealed and not already flagged.
- removes the flag if its already flagged.
handleContextMenu(event, x, y) {
   event.preventDefault();  // prevents default behaviour (i.e. right click menu on browsers.)
   let updatedData = this.state.boardData;
   let mines = this.state.mineCount;
   let win = false;

   // check if already revealed
   if (updatedData[x][y].isRevealed) return;
   if (updatedData[x][y].isFlagged) {
     updatedData[x][y].isFlagged = false;
     mines++;
   } else {
     updatedData[x][y].isFlagged = true;
     mines--;
   }

   if (mines === 0) {
     const mineArray = this.getMines(updatedData);
     const FlagArray = this.getFlags(updatedData);
     if (JSON.stringify(mineArray) === JSON.stringify(FlagArray)) {
       this.revealBoard();
       alert("You Win");
     }
   }

   this.setState({
     boardData: updatedData,
     mineCount: mines,
     gameWon: win,
   });

 }
And that’s it, the main logic behind the minesweeper game I built. I have left a few helper functions that are fairly easy to understand. It is still far from perfect but the core features are there.
Conclusion
It is fairly easy to build a minesweeper game in react. Along the way I have learnt some basic concepts of react such as making components, managing component states, passing data down to children component using props, handling events and rendering element in react using JSX.
Some further improvements we could make would be for instance:
- Rebuild the board if the first move of the player lands on a mine. (Some versions of Minesweeper will set up the board by never placing a mine on the first square revealed.)
- A skill level select option to determine the size of the grid and the number of mines.
You can find a working demo on this codepen link.
If you want to fiddle with the code, here is a stackblitzlink.
You can find the github repo with level select featurehere. Please note it’s still a work in progress and is not without bugs and issues.